Szerző: BasketClinic

  • Teaching Defensive Fundamentals Through 3-on-3

    Teaching Defensive Fundamentals Through 3-on-3

    Many successful basketball programs are built on strong defensive fundamentals.

    Players who understand and consistently execute these principles can provide a team with a foundation that remains valuable throughout an entire season.

    The following progression uses 3-on-3 situations to teach and reinforce basic defensive habits.

    The main objectives are:

    • defensive stance and positioning,
    • stopping penetration,
    • helping and recovering,
    • defending cuts,
    • defending screens,
    • protecting against weak-side cuts,
    • closing out on shooters,
    • and finishing the possession with a box-out.

    These concepts should be practiced repeatedly until they become part of the players’ defensive behavior.

    General Coaching Points

    Each sequence can be performed for approximately one minute, with players alternating between offense and defense.

    Throughout every drill, emphasize:

    • proper defensive stance,
    • communication,
    • aggressiveness,
    • and correct positioning.

    The details of each action may change, but these principles should remain constant.

    1. Defensive Stance and Positioning

    Place three offensive players on the perimeter:

    • one at the top,
    • one on each wing.

    Each offensive player has a defender.

    Start with the ball at the top.

    The offense passes the ball around the perimeter while remaining stationary.

    The defenders adjust their positions according to the movement of the ball.

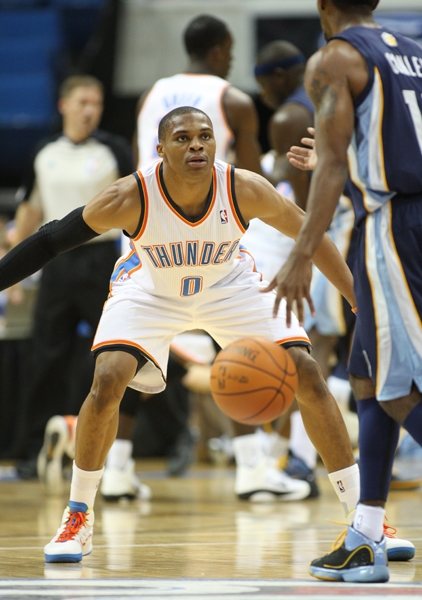
    Emphasize the correct defensive stance in three situations:

    • guarding the ball,
    • playing in help position,
    • denying or pressuring the next pass.

    Defenders should react to the pass, not simply to ball fakes.

    The purpose of the drill is to teach players that defensive positioning constantly changes as the ball moves.

    2. Stop the Drive — Help and Recover

    The offense now attempts to penetrate through the gaps between defenders.

    The first objective is for the on-ball defender to contain the drive.

    If penetration occurs, an off-ball defender must help.

    Once the penetration has been stopped, the helper must recover quickly to the original assignment.

    The sequence becomes:

    contain → help → stop the drive → recover

    Players should understand that help defense does not replace individual defense.

    The first responsibility is still to stop the ball.

    3. Defend the Cut

    Pass the ball from the top to a wing.

    After passing, the offensive player cuts toward the basket.

    The defender of the passer must immediately adjust position in the direction of the ball and prevent the cutter from receiving an easy pass.

    Emphasize:

    • pressure on the ball,
    • movement into the passing lane,
    • seeing both ball and player,
    • and preventing a clean catch near the basket.

    Once the action is completed, rotate an offensive player back to the top and reverse the ball.

    4. Defend the Screen

    Pass the ball from the top to a wing.

    The passer then moves to set an off-ball screen for the opposite wing.

    The defender guarding the screener must move in the direction of the pass and create enough space for the teammate to navigate the screen.

    At the same time, the defender must remain aware that the screener may:

    • roll toward the ball,
    • slip the screen,
    • or become available after contact.

    The defender guarding the cutter must find a path around the screen and regain a functional defensive position.

    The exact screen-defense technique can vary according to the team’s system.

    The objective remains the same:

    do not allow the screen to create an uncontested scoring opportunity.

    5. Defend the Weak-Side Cut

    When an offensive player cuts from the weak side toward the basket, the help-side defender should position between the ball and the assigned player.

    The defender should make the cut difficult and influence the offensive player away from the basket.

    At the same time, there must be pressure on the ball.

    If the ball handler is allowed to see the entire floor comfortably, weak-side cuts become much more dangerous.

    As the weak-side player cuts toward the middle, the other offensive players rotate accordingly.

    The defense must adjust with them.

    6. Close Out and Box Out

    The final phase emphasizes finishing the possession.

    When the coach calls:

    “Shot!”

    the offensive player takes the shot.

    The defender guarding the shooter should also communicate:

    “Shot!”

    All three defenders must immediately find their players, make contact and box out.

    The defensive sequence is not complete when the shot leaves the hand.

    It is complete when the defense secures possession.

    After the rebound, the player makes an outlet pass to the coach and the repetition ends.

    Why 3-on-3 Works

    Three-on-three basketball creates an excellent teaching environment because every player is involved.

    There is enough space for players to recognize:

    • positioning,
    • penetration,
    • help,
    • recovery,
    • cuts,
    • screens,
    • and rebounding responsibilities.

    At the same time, the situation remains simple enough for the coach to stop the action and make corrections.

    Progressions and Variations

    These drills can easily be modified.

    For example:

    • place one offensive player in the low post and work on post defense,
    • allow direct wing-to-wing passes,
    • introduce more aggressive denial,
    • change the type of screen,
    • allow live penetration,
    • or add different offensive movements.

    The number of possible variations is almost unlimited.

    The important point is that every variation should reinforce the same defensive principles.

    Build Habits Before Building Systems

    The value of 3-on-3 defense is not the drill itself.

    The value is the opportunity to teach habits.

    Players learn to:

    • move when the ball moves,
    • communicate,
    • protect the basket,
    • help teammates,
    • recover,
    • defend cuts,
    • negotiate screens,
    • close out,
    • and finish possessions with rebounds.

    Once these habits become automatic in 3-on-3, they can be transferred into 4-on-4 and eventually full 5-on-5 team defense.

    Strong team defense begins with simple situations performed correctly again and again.
  • 30 Minutes of Defense

    30 Minutes of Defense

    Here is a practical framework for building a defensive segment of practice.

    Before selecting drills, the coach must first answer a more important question:

    What kind of defense do we want to play?

    The defensive style of the team must be clearly defined before it can be trained effectively.

    Define Your Defensive Identity

    Before designing the practice, answer the following questions.

    What Is the Main Objective of the Defense?

    Do we want to:

    • force turnovers?
    • protect the paint?
    • influence the ball toward the sideline?
    • influence the ball toward the middle?

    There is no meaningful defensive drill without first understanding what the defense is trying to accomplish.

    How Do We Transition Back on Defense?

    Decide:

    • how many players sprint back,
    • which players are responsible for transition defense,
    • and what their priorities are.

    Transition defense must be organized rather than left to chance.

    How Do We Defend the Post?

    Decide how the team will guard an interior player.

    Possible approaches include:

    • fronting,
    • playing on the high side,
    • playing behind,
    • changing the position according to the location of the ball,
    • or trapping the post.

    Whatever method is selected, the entire team must understand how to react when the post receives the ball.

    How Do We Defend the Ball Handler?

    Determine:

    • whether the ball is influenced in a particular direction,
    • whether the defender sends the ball toward the sideline or middle,
    • whether the defender plays square,
    • and how high on the floor pressure begins.

    The on-ball defender must know exactly what the team expects.

    How Do We Defend Away from the Ball?

    The off-ball defense may include:

    • denial,
    • help positioning,
    • and help-and-recover responsibilities.

    The player without the ball is still involved in defending the ball.

    How Do We Defend Screens?

    Decide:

    • whether the defense switches,
    • when switching is allowed,
    • and when defenders remain with their original assignments.

    These decisions must be established before the team can execute them consistently.

    Defensive Practice Priorities

    Once the defensive philosophy has been defined, practice can be built around the following areas.

    1. Pressure the Ball

    Do not allow the ball handler to play comfortably.

    The defender should influence what the offensive player can do rather than simply reacting.

    2. Deny the Pass

    Disrupt the offense.

    Prevent or make difficult:

    • passes,
    • cuts,
    • catches,
    • and other offensive actions.

    When playing denial defense, the objective is simple:

    Do not allow your player to receive the ball easily.

    When contesting rather than fully denying, force the offensive player to receive the ball farther away from the three-point line or from the preferred attacking area.

    3. Defend the Post

    The defense must have a clear plan for post play.

    Possible approaches include:

    • fronting,
    • playing high side,
    • adjusting according to whether the ball is above or below the free-throw line,
    • playing behind,
    • or trapping with different defenders.

    The specific choice matters less than the fact that the entire team reacts together.

    If the post catches the ball, the defense should know exactly what happens next.

    When possible, force the interior player toward a more difficult shot, such as a fadeaway.

    4. Help and Recover

    A defender does not only guard an individual opponent.

    Every defender also helps guard the ball.

    Because containing the ball is one of the most difficult defensive responsibilities, off-ball defenders must be prepared to help and then recover to their own assignments.

    5. Box Out

    A defensive possession is not finished until the defense secures the rebound.

    Force a difficult shot.

    Then box out.

    Then rebound.

    Then run.

    Practice Competitively

    Competitive drills help maintain defensive intensity.

    Instead of allowing the drill to continue without consequence, establish clear defensive objectives.

    For example:

    • require a weak-side box-out,
    • require two consecutive defensive rebounds,
    • or demand a certain number of defensive stops before the defense can leave the floor.

    The defensive team should have something to earn.

    Defensive Scoring

    Another method is to create a scoring system.

    For example:

    • 3 points for forcing an offensive foul,
    • 2 points for a defensive rebound or steal,
    • 1 point for a deflection.

    A competitive scoring system rewards the defensive behaviors the coach wants to develop.

    Part 1 — Defensive Fundamentals

    Use small-sided drills to teach individual and small-group defensive fundamentals.

    Possible formats include:

    • 1-on-1,
    • 2-on-2,
    • 3-on-3.

    The original plan suggests four short drills of approximately three minutes each.

    1-on-1: Defending the Ball

    Objective

    Teach the defender to:

    • contain the ball handler,
    • influence the drive,
    • contest the shot,
    • and finish the possession with a box-out.

    1-on-1: Defending the Post

    Objectives

    Teach the defender to:

    • defend the post position,
    • deny or disrupt the entry pass,
    • maintain the selected defensive position,
    • and force a difficult shot if the ball is received.

    1-on-1: Defending Away from the Ball

    Practice off-ball defense from different locations:

    • on the wing,
    • on the ball side,
    • on the weak side.

    The coach may take the shot so the defender must finish the possession by boxing out.

    Combination Drill

    Combine several defensive responsibilities in one sequence.

    Possible teaching points include:

    • sprinting into help position,
    • ball-side positioning,
    • defending cuts,
    • preventing backdoor cuts,
    • forcing catches farther away from the basket,
    • and boxing out.

    2-on-2: Sprint to Help

    The objective is to teach defensive positioning according to the movement of the ball.

    Players should practice:

    • helping on a baseline drive,
    • recovering to their own player,
    • denying a ball-side cutter,
    • and boxing out.

    A possible progression is:

    1. help position,
    2. baseline penetration,
    3. weak-side cut.

    3-on-3: Closeout and Box-Out

    Objective

    Teach defenders to finish every defensive possession.

    Emphasize:

    • closeouts,
    • containing penetration,
    • contesting shots,
    • and boxing out in every situation.

    3-on-3: Defending Screens

    Objective

    Teach the defense to:

    • disrupt catches,
    • defend screening actions,
    • defend cuts after screens,
    • and execute the team’s chosen screen-defense rules.

    4-on-3: Communication, Help and Recovery

    Playing at a temporary numerical disadvantage forces defenders to communicate and cooperate.

    Emphasize:

    • communication,
    • closeouts,
    • help positioning,
    • recovery,
    • and defending penetration.

    This type of drill teaches players that team defense is based on collective movement rather than isolated individual matchups.

    Part 2 — Shell Drill

    The Shell Drill can be used to develop team defensive positioning.

    The main focus is:

    • ball-side positioning,
    • help-side positioning,
    • movement with the ball,
    • communication,
    • and collective responsibility.

    A possible progression includes:

    1. Sprint to help.
    2. Defend penetration.
    3. Defend cuts.
    4. Defend guard-to-wing screens.
    5. Defend guard-to-guard screens.
    6. Defend off-ball screens.
    7. Allow only the post player to operate inside.
    8. Defend every offensive intention and anticipate the next action.

    The final goal is not simply reacting.

    The defense should begin to think one action ahead.

    Part 3 — Earn the Right to Play Offense

    A powerful competitive method is to require the defensive team to achieve a specific objective before it can switch to offense.

    Possible conditions include:

    • three steals,
    • three defensive rebounds,
    • three offensive fouls forced,
    • three consecutive defensive stops,
    • or two consecutive stops.

    The exact condition can change according to the emphasis of the practice.

    The principle remains the same:

    defense must earn possession.

    Build Defense from the Inside Out

    A strong defensive practice should not be a random collection of drills.

    It should progress logically:

    individual defense → small-group defense → team defense → competitive execution

    First define the defensive philosophy.

    Then teach the individual responsibilities.

    Next connect players through help, recovery and communication.

    Finally, place those principles into competitive situations.

    Thirty focused minutes of defense can be extremely valuable when every drill reinforces the same defensive identity.

  • Principles for Teaching Zone Presses

    Principles for Teaching Zone Presses

    The following principles can be applied when teaching different types of zone presses.

    Regardless of the exact alignment, an effective pressing zone depends on constant movement, pressure on the ball, communication and disciplined positioning.

    Make the Ball Move

    Always force the offense to move the ball.

    Every pass changes the responsibilities and positions of the defenders.

    The defense must adjust immediately.

    If the players fail to react to the movement of the ball, the press will break down.

    This is one of the most fundamental principles of zone pressure — and one of the easiest to forget.

    Define the Type of Press

    Players must clearly understand what type of zone press the team is playing.

    Are you:

    • trapping, or
    • simply pressuring and containing?

    If the objective is to trap, two defenders must consistently apply pressure to the ball after the appropriate passes.

    If the objective is pressure without trapping, the defender on the ball must still apply enough pressure to prevent easy long passes that can immediately break the press.

    The entire team must understand the objective of the system.

    Force the Worst Pass

    Do not allow the offense to make the easiest and most dangerous pass.

    The defense should try to influence the ball toward less favorable passing options.

    A successful press does not simply react to the offense.

    It attempts to decide where the offense can go.

    Force the Ball Handler to Pick Up the Dribble

    Every defender should look for opportunities to force the offensive player to end the dribble.

    Once the dribble has been picked up, the defense can increase pressure on the ball without the same danger of being beaten off the dribble.

    This creates an important advantage for the press.

    Use Active Hands

    Teach continuous and purposeful hand activity around the ball.

    Defenders should look for opportunities to:

    • deflect passes,
    • disrupt passing lanes,
    • or create steals.

    But active hands must remain disciplined.

    Aggressiveness should not result in unnecessary fouls.

    A Press Requires Sprinting

    No team can play an effective zone press without running.

    If even one defender is late reaching the correct position, the entire structure of the press may be compromised.

    Players must sprint to their responsibilities.

    Aggressiveness, however, does not mean uncontrolled play.

    Running hard and playing with intensity are not excuses for committing fouls.

    Get a Hand on Every Pass You Can

    Encourage players to deflect every pass they can reach.

    Even when the defense does not immediately gain possession, a deflection can:

    • change the direction of the ball,
    • slow the offense,
    • disrupt timing,
    • and create another opportunity for the defense.

    Small disruptions can eventually create turnovers.

    Keep the Ball Away from Dangerous Areas

    An aggressive zone press should direct the ball away from the most dangerous areas of the floor.

    In particular, the defense should try to keep the ball away from:

    • the middle of the court,
    • and dangerous passing or advancing lanes on the ball side.

    Allowing the offense easy access to the middle often creates passing angles that can break the press.

    The defense should therefore use positioning and pressure to influence the offense toward less favorable areas.

    The Press Is a Team Defense

    A zone press cannot function as five separate defensive actions.

    Every pass changes:

    • who pressures the ball,
    • who protects the next pass,
    • who covers behind the pressure,
    • and where every defender must move.

    That is why the press demands constant awareness and collective movement.

    The basic principles are simple:

    • move with every pass,
    • know whether you are trapping or containing,
    • force difficult passes,
    • make the ball handler pick up the dribble,
    • use active hands,
    • sprint into position,
    • deflect passes,
    • and keep the ball away from dangerous areas.

    When all five defenders follow these principles together, the zone press becomes more than pressure.

    It becomes an organized defensive system.

  • Help and Switch: Defending the Three-Point Shot

    Help and Switch: Defending the Three-Point Shot

    Basketball is a constant tactical duel.

    Whenever the offense develops a new weapon, the defense must understand it and find an appropriate response.

    The same process then begins again in the opposite direction.

    One of the offensive developments that changed this relationship was the three-point shot.

    As teams learned to use penetration followed by a kick-out pass to the perimeter, defenses had to find new ways to protect both the basket and the three-point line.

    The Problem with Drive-and-Kick Offense

    A common offensive action is simple:

    penetrate toward the basket, force defensive help, then pass the ball back outside to an open three-point shooter.

    The traditional defensive response is help and recover.

    A defender leaves his own player temporarily to stop penetration, then attempts to recover back to the original assignment.

    This can work.

    But it creates an important problem.

    If the offense and defense execute at approximately the same level, the offense often has the advantage.

    The help defender must travel toward the basket.

    Then, after the kick-out pass, that same defender must cover a much greater distance to return to the perimeter.

    That recovery can be too long.

    Since the Introduction of the Three-Point Shot

    The three-point line increased the distance a defender must cover when recovering to an outside shooter.

    Before the three-point shot, imagine a player making 40% of long two-point attempts.

    That would produce:

    0.40 × 2 = 0.80 points per attempt

    A shot from the same distance worth three points produces:

    0.40 × 3 = 1.20 points per attempt

    The same shooting percentage therefore creates a much more valuable offensive result.

    That changes the defensive calculation.

    Allowing a clean kick-out shot to a strong three-point shooter can be extremely costly.

    Help and Switch

    One possible solution is Help and Switch.

    The principle is simple.

    When a defender helps stop penetration, that defender stays with the ball handler instead of trying to recover immediately to the original assignment.

    The defender who was beaten on the drive then rotates toward the basket and picks up the offensive player who was left open by the helper.

    In other words:

    help does not automatically mean recover.

    Sometimes help should lead directly into a switch.

    How the Rotation Works

    Imagine Player 1 drives toward the basket.

    Defender A is beaten.

    Defender B leaves Player 2 and helps stop Player 1.

    Under a traditional help-and-recover system, B would then attempt to return to Player 2.

    Under Help and Switch, B remains on Player 1.

    Defender A, instead of chasing the original matchup, rotates toward the open Player 2.

    This can shorten the defensive recovery distance and provide a better chance of contesting the perimeter shot.

    Help and Double Switch

    There are situations in which even the first switch may not be fast enough.

    Suppose:

    • Player 1 is an excellent passer,
    • Player 2 is a dangerous quick-release shooter,
    • and the offense can immediately exploit the first defensive rotation.

    In this case, the defense can use a Help and Double Switch.

    A third defender rotates outward toward the dangerous shooter as soon as the pass leaves the ball handler’s hands.

    The remaining defenders then reorganize the other matchups behind the play.

    This option may be especially useful when the coaching staff has identified a specific perimeter player as a major three-point threat.

    The System Looks Simple — Execution Is Not

    Help and Switch may appear easier than Help and Recover.

    Conceptually, it is.

    Executing it correctly is much more difficult.

    Several rules must be followed.

    Rule 1: Allow as Few Penetrations as Possible

    Help and Switch is a solution to penetration.

    It should not become an excuse for allowing penetration.

    If the on-ball defender is beaten repeatedly, the defense will eventually break down regardless of how sophisticated the rotations are.

    The first responsibility remains:

    contain the ball.

    Rule 2: Communicate

    Communication is essential.

    When the on-ball defender realizes help is needed, the defender must communicate.

    When the helper commits to the ball and a switch occurs, that information must also be communicated loudly and clearly.

    If a third defender initiates the Double Switch, the same rule applies.

    Every player involved must know that the defensive assignments have changed.

    Silent switching produces confusion.

    Rule 3: Put Immediate Pressure on the Ball

    Once the helper takes over the ball handler, there must be immediate pressure on the ball.

    The offensive player should not be allowed to:

    • shoot comfortably,
    • make an easy pass,
    • or calmly read the next defensive rotation.

    The purpose of the help is not merely to stand in front of the penetration.

    It is to disrupt the offense.

    Rule 4: Sprint to the Open Player — but Under Control

    The defender who has been helped should immediately rotate toward the newly open offensive player.

    This must be done quickly.

    But the defender should not simply sprint blindly toward the perimeter.

    The recovery angle matters.

    The defender should protect against the most dangerous immediate action.

    Protect the Basket First

    The recovering defender should not run directly toward the outside shooter if that creates an open driving lane to the basket.

    Instead, the defender should take a path that protects the paint and intersects the offensive player’s potential drive.

    This is an important principle.

    An uncontested three-point shot is dangerous.

    But an uncontested layup is even more damaging.

    The defense must therefore close the space while still protecting the basket.

    Know the Opponent

    The Help and Switch system becomes more effective when the defense knows the tendencies of the offense.

    Before the game, coaches should identify:

    • the best penetrators,
    • the best passers,
    • the quickest-release shooters,
    • the most dangerous three-point shooters,
    • and the players the defense is willing to help away from.

    Not every offensive player represents the same threat.

    The rotation can therefore be adjusted according to personnel.

    Defense Is a Chain Reaction

    Drive-and-kick offense forces the defense to make consecutive decisions.

    The first defender must contain.

    The helper must decide when to commit.

    The beaten defender must rotate.

    A third defender may need to switch again.

    All of this must happen in a very short period of time.

    That is why three-point defense is not simply the responsibility of the defender guarding the shooter.

    It is a team defensive problem.

    The quality of the closeout often depends on what happened several actions earlier.

    Help, Switch and Recover with Purpose

    The introduction of the three-point shot changed the geometry of basketball.

    Defenders now have greater distances to cover.

    Offenses can punish late help more severely.

    For that reason, the traditional instruction to simply “help and recover” may not always be enough.

    Sometimes the better solution is:

    help and switch.

    Against especially dangerous shooters, the answer may be:

    help and double switch.

    Whatever system is used, the principles remain the same:

    • contain penetration,
    • communicate,
    • pressure the ball,
    • rotate quickly,
    • protect the basket,
    • and know which shooters cannot be left open.

    Good defense is not merely reacting to the offense.

    It is understanding what the offense is trying to create — and arriving at the next solution first.

  • Strengthening After Knee Injury or Surgery

    Strengthening After Knee Injury or Surgery

    How can we gradually strengthen the leg after a knee injury or knee surgery?

    The following exercises come from an earlier Basket Clinic rehabilitation program and focus primarily on:

    • controlled knee loading,
    • balance,
    • single-leg stability,
    • lower-limb strength,
    • coordination,
    • and gradual restoration of movement.

    Important: Rehabilitation after a knee injury or surgery must be individualized. The appropriate exercises and timing depend on the exact injury, surgical procedure and stage of recovery. These exercises should therefore be considered an archival training resource rather than a substitute for guidance from a doctor or physiotherapist.

    Knee Exercises

    1. Forward Lunge Position with Controlled Hold

    Step forward into a lunge position with the recovering leg.

    Keep the other leg controlled and gradually transfer the work toward the recovering side.

    Hold the position for approximately 4–5 seconds, then return to the starting position.

    The movement should remain controlled throughout.

    2. Heel Raise in a Lunge Position

    Take a lunge stance with the recovering leg in front and the other leg behind.

    Raise the heel of the front foot.

    Hold for approximately 4–5 seconds, then slowly lower it.

    3. Small Steps Forward

    Begin in a lunge position with the recovering leg in front.

    Using small steps, bring the other foot toward the recovering leg while keeping both knees flexed.

    Then return gradually to the original position.

    4. Small Cross-Steps Behind

    Maintain the same starting position.

    Use the other leg to make small crossing steps behind the recovering leg.

    Return gradually to the starting position.

    5. Step Together and Back

    Start with the recovering leg in front.

    Bring the other foot forward beside it while keeping both knees flexed.

    Then step back into the original position.

    6. Cross-Step Behind

    From the same lunge position, step the non-injured leg behind the recovering leg.

    Return to the starting position.

    The emphasis is on balance and controlled movement.

    7. Single-Leg Balance

    Begin with the recovering leg in front.

    Lift the opposite leg from the floor while maintaining the recovering knee in a flexed position.

    Hold the balance before returning the foot to the ground.

    8. Single-Leg Balance with Knee Extension

    Lift the opposite leg while gradually extending the recovering knee.

    Return slowly and under control.

    9. Single-Leg Flexion and Extension

    Lift the opposite foot from the floor.

    Balance on the recovering leg.

    From this position:

    • extend the recovering knee,
    • flex it again,
    • then place the opposite leg back on the floor.

    10. Trunk Rotation in a Lunge Position

    Hold a stable lunge position with the recovering leg forward.

    Place both hands behind the head.

    Slowly rotate the trunk:

    • to the right,
    • then to the left.

    The lower body should remain controlled.

    11. Small Knee Pulses

    Maintain the lunge position.

    Perform small, controlled up-and-down movements through the recovering knee.

    Avoid uncontrolled bouncing.

    Wide-Stance Exercises

    The next group of exercises begins from a wide stance.

    Both feet are turned slightly outward.

    The knees should track in the same direction as the toes and remain appropriately aligned with the ankles.

    12. Wide-Stance Squat

    Stand with the feet wide apart.

    Bend both knees into a controlled squat, then return upward.

    Maintain knee alignment throughout the movement.

    13. Alternating Side Loading

    From the wide stance:

    • bend the recovering knee while keeping the opposite leg straighter,
    • return to the middle,
    • then repeat toward the other side.

    The goal is to progressively transfer body weight from one side to the other.

    14. Heel Raises and Knee Bends

    Remain in the wide stance with both knees flexed.

    Perform:

    • two heel raises,
    • two slow knee-bending movements,
    • then repeat the heel raises.

    Maintain the same controlled lower-body position throughout.

    15. Step Together from a Wide Stance

    From the wide, flexed-knee position:

    • bring the right foot toward the left,
    • keep both knees flexed,
    • return to the wide stance.

    Repeat on the opposite side.

    16. Step Together with a Squat

    Bring one foot toward the other while maintaining knee flexion.

    Perform a controlled squat.

    Rise without completely locking the knees, then step back into the wide stance.

    Repeat on both sides.

    17. Single-Leg Hold to the Front

    From the wide stance, transfer the weight onto one leg.

    Lift the opposite leg and hold it slightly forward for approximately 4–5 seconds.

    Return to the wide stance.

    Repeat on the other side.

    18. Single-Leg Hold Behind

    Again transfer the weight to one leg.

    Lift the opposite leg and hold it slightly behind and across the body for approximately 4–5 seconds.

    Return to the starting position.

    Repeat on both sides.

    19. Toe-Raise Walk-In

    Begin in the wide stance with the knees flexed.

    Rise onto the toes.

    Using small steps:

    • bring the feet toward each other,
    • maintain knee flexion,
    • lower the heels in the middle,
    • rise onto the toes again,
    • and step back into the wide stance.

    Then lower both heels.

    20. Heel Raises, Step-In and Squat

    From the wide stance:

    1. perform two heel raises,
    2. use small steps to bring the feet together,
    3. perform a controlled squat,
    4. rise again without fully locking the knees,
    5. step back into the wide stance.

    21. Alternating Side Heel Raises

    From the wide stance:

    • extend the left knee while keeping the right knee flexed,
    • perform two heel raises on the right side,
    • return to the central position with both knees flexed,
    • perform two heel raises,
    • then repeat the sequence on the opposite side.

    Quality Before Quantity

    After a knee injury or surgery, the objective is not simply to complete as many repetitions as possible.

    Movement quality matters.

    The athlete should pay attention to:

    • balance,
    • knee alignment,
    • controlled flexion and extension,
    • stability,
    • gradual weight transfer,
    • and symmetrical movement whenever appropriate.

    Progression should be gradual.

    Basketball eventually demands much more than basic strength.

    The player must ultimately regain the ability to:

    • run,
    • stop,
    • change direction,
    • jump,
    • land,
    • defend,
    • and tolerate repeated basketball-specific loading.

    These exercises represent only one stage of that process.

    The goal is not simply to make the knee stronger.

    The goal is to rebuild the movement capacity required for a safe return to basketball.

  • Ice Age in Practice: Managing Sports Injuries

    Ice Age in Practice: Managing Sports Injuries

    This article looks at the basic principles behind sports injuries, the healing process and the traditional use of rest, ice, compression and elevation.

    Important: This is an archival educational resource. Sports injuries vary greatly in type and severity, and significant or persistent injuries should be assessed by an appropriately qualified healthcare professional.

    Types of Injury

    Sports injuries can broadly be divided into two groups.

    Injuries Caused by Internal Forces

    These may result from sudden or repeated forces generated within the body.

    Examples include:

    • muscle strains,
    • muscle tears,
    • overuse injuries,
    • stress-related injuries,
    • and changes caused by repeated loading.

    Some develop suddenly.

    Others appear gradually as repeated stress exceeds the ability of the tissue to recover.

    External or Traumatic Injuries

    These occur when the body is exposed to an external force.

    Examples include:

    • collisions,
    • falls,
    • direct blows,
    • bruises,
    • fractures,
    • and dislocations.

    External stresses can also contribute to smaller repetitive problems such as blisters.

    What Happens After a Soft-Tissue Injury?

    When soft tissue is injured, some of the affected tissue and small blood vessels may also be damaged.

    The amount of bleeding and swelling depends on:

    • the type of tissue involved,
    • the severity of the injury,
    • and the circulation within the injured area.

    The body then begins a complex healing response.

    The Stages of Healing

    It is impossible to predict an exact recovery time for every injury.

    Recovery is influenced by factors such as:

    • severity,
    • age,
    • tissue involved,
    • general physical condition,
    • rehabilitation,
    • and the way the injury is managed.

    The original framework divides healing into three overlapping phases.

    1. Acute or Inflammatory Phase

    This begins immediately after injury and continues for the first several days.

    2. Repair Phase

    This begins relatively early after injury and may continue for several weeks.

    3. Remodeling Phase

    This develops later in the recovery process and may continue for many months.

    These phases are not completely separate.

    They overlap as the body moves from the initial response toward repair and eventually toward stronger, more functional tissue.

    The Acute Phase

    The first stage begins immediately following injury.

    Typical signs may include:

    • pain,
    • warmth,
    • redness,
    • swelling,
    • and loss of normal function.

    Bleeding into damaged tissues may contribute to swelling and sometimes visible discoloration.

    The body responds rapidly to the injury.

    Blood vessels, inflammatory cells and damaged tissues all participate in the early healing process.

    Inflammation is therefore not simply an unwanted event.

    It is part of the body’s response to tissue damage.

    During this period, however, the injured area may be vulnerable to further stress.

    Early Tissue Repair

    As the healing response progresses, an early structural framework begins to form across the damaged tissue.

    Initially this new material is relatively weak.

    This is one reason why excessive stress immediately after an injury may interfere with recovery.

    Muscle spasm can also occur as part of the body’s protective response.

    Although this may restrict movement around the injured area, it can also contribute to discomfort.

    The early management of an injury therefore aims to protect the damaged area and avoid unnecessary additional trauma.

    Traditional Management During the Acute Phase

    The original article uses the classic principles of:

    • Rest
    • Ice
    • Compression
    • Elevation

    These principles have traditionally been used to help manage pain and swelling following acute soft-tissue injury.

    Rest

    Immediately after an injury, stop the activity that caused or aggravated the problem.

    The injured area should be protected from further unnecessary stress.

    Rest, however, does not necessarily mean complete inactivity for the entire body.

    Depending on the injury and professional advice, an athlete may sometimes continue appropriate training for unaffected parts of the body.

    The objective is to protect the injury without losing all physical conditioning unnecessarily.

    Ice

    Cold treatment has traditionally been used after acute injuries, particularly to help manage pain.

    If ice is used:

    • do not place it directly against the skin,
    • wrap the cold pack in a suitable cloth,
    • avoid excessive exposure,
    • and stop if the skin reacts abnormally or the treatment becomes painful.

    Reduced pain after cooling should not be interpreted as proof that the athlete is ready to return immediately to activity.

    Pain relief and tissue recovery are not the same thing.

    When Extra Caution Is Needed with Ice

    Cold treatment should be used carefully.

    Particular caution is appropriate when:

    • sensation in the area is reduced,
    • circulation is impaired,
    • the athlete has an unusual reaction to cold,
    • or there is uncertainty about the nature of the injury.

    When in doubt, seek professional medical advice.

    Compression

    A supportive compression bandage has traditionally been used to help control swelling.

    Compression should be firm but never so tight that it interferes with circulation.

    If the athlete experiences:

    • numbness,
    • tingling,
    • unusual discoloration,
    • increasing pain,
    • or loss of sensation,

    the bandage should be reassessed immediately.

    Elevation

    Elevating an injured limb may also help manage swelling.

    The injured area should be comfortably supported rather than placed in a position that creates additional pain or tension.

    First Aid Matters

    Early decisions after an injury may influence the recovery process.

    The first priority is always safety.

    If the athlete remains in danger, move them away from that danger when it is safe to do so.

    More serious injuries require appropriate medical assessment.

    Coaches should understand the limits of their own role.

    The job of the coach is not to diagnose every injury.

    The job is to recognize when a player needs professional care.

    The Repair Phase

    As the initial inflammatory response settles, the body begins repairing the damaged tissue.

    New connective tissue develops and gradually becomes stronger.

    However, newly repaired tissue does not immediately possess the same strength or function as healthy tissue.

    For this reason, rehabilitation must progress gradually.

    Too little loading may fail to prepare the tissue for sport.

    Too much loading too early may aggravate the injury.

    The challenge is finding the appropriate progression.

    Returning to Movement

    During the repair phase, carefully selected movement can gradually become part of rehabilitation.

    The objective is eventually to restore:

    • range of motion,
    • strength,
    • coordination,
    • flexibility,
    • and sport-specific function.

    Progression should be controlled.

    Pain or significant worsening of symptoms should not simply be ignored.

    The athlete must gradually earn the ability to perform increasingly demanding tasks.

    Returning to Basketball

    Feeling better is not the same as being ready to compete.

    Basketball requires much more than pain-free walking.

    A returning player may need to tolerate:

    • running,
    • acceleration,
    • deceleration,
    • jumping,
    • landing,
    • cutting,
    • contact,
    • defensive movement,
    • repeated high-intensity efforts,
    • and basketball-specific decision-making.

    The final objective is therefore not simply the disappearance of pain.

    It is the restoration of the physical and functional ability required to play basketball safely and effectively.

    The Coach’s Responsibility

    Coaches should understand basic injury-management principles.

    But they should also understand when responsibility must pass to medical and rehabilitation professionals.

    A player should not return simply because:

    • an important game is approaching,
    • the team needs them,
    • the pain temporarily disappears,
    • or the athlete insists that everything is fine.

    The long-term health of the player must remain more important than one practice or one game.

    Ice, compression and elevation may be tools.

    But the most important tool is good judgment.