Címke: strength training

  • 100 Off-Season Tasks for Basketball Players

    100 Off-Season Tasks for Basketball Players

    An Off-Season Basketball Development Program

    The off-season provides an opportunity to improve skills, physical preparation, basketball habits and confidence.

    The following list comes from an earlier Basket Clinic training program and presents 100 ideas for individual off-season development.

    Important: This is an archival training resource. Some of the original training volumes and methods reflect an earlier approach to athletic preparation and should not automatically be treated as modern prescriptions. Training load should always be adjusted to the player’s age, development, health, experience and individual needs.

    At Home

    1. Perform 25 fingertip push-ups.
    2. Perform 500 calf raises.
    3. Take 100 simulated shots while lying on your back, concentrating on the shooting motion.
    4. Perform isometric exercises using a doorframe, with an emphasis on leg work.
    5. Read basketball and motivational books and develop a positive mental attitude.
    6. Squeeze two tennis balls to work on hand strength.
    7. Hold and handle a basketball while watching television.
    8. Sleep with your basketball.

    Outdoor Tasks

    1. Jog 3–7 kilometers daily.
    2. Practice dribbling a golf ball or tennis ball.
    3. Jump rope for 10 minutes every day.
    4. Practice spinning the basketball on your fingers.
    5. Work on gripping and controlling the basketball in your hands.
    6. Practice juggling three balls.
    7. Run 10 × 30-meter sprints.
    8. Play in adidas Streetball events.

    In the Gym

    1. Warm up properly and perform mobility and stretching exercises.
    2. Play plenty of 1-on-1.
    3. Play plenty of 2-on-2.
    4. Play plenty of 3-on-3.
    5. Play plenty of 4-on-4.
    6. Play plenty of 5-on-5.
    7. Handle the ball between and around your legs without looking down.
    8. Dribble two basketballs simultaneously.
    9. Slalom-dribble between chairs.
    10. Practice dribbling while sitting on a chair.
    11. Practice the behind-the-back dribble.
    12. Sprint-dribble the full length of the court.
    13. Practice changing speed while dribbling with both hands.
    14. Perform a spin move at each court line.
    15. Practice between-the-legs changes of hand.
    16. Touch the net, backboard or rim continuously 25 times, depending on your jumping ability.
    17. Perform 25 jumps over a bench or similar obstacle.
    18. Practice dribbling with your eyes closed.
    19. Dribble while moving in a circle with the opposite hand touching the floor.
    20. Dribble around the three circles of the basketball court.

    Shooting and Finishing

    1. Shoot from approximately 30 centimeters from the basket and carefully check your technique — elbow position, wrist action and follow-through.
    2. Make 10 layups from each side.
    3. Practice 10 post moves from each side.
    4. Practice stationary hook shots for 5 minutes.
    5. Practice hook shots with both hands for 10 minutes.
    6. Take 50 mid-range shots from inside.
    7. Shoot 100 free throws.
    8. Take 20 bank shots from each side.
    9. Take 100 set or rhythm shots from approximately five meters without using a dribble.
    10. Take 100 jump shots from approximately five meters.
    11. Practice attacking and penetration moves 100 times.
    12. Take 100 jump shots from approximately 7.5 meters.
    13. If you are physically capable, practice 10 dunks with each hand.

    Ball Control

    1. Move the basketball around each leg.
    2. Move the basketball around both legs together.
    3. Move the basketball around your head.
    4. Move the basketball around your waist.

    Strength Development

    1. Perform leg presses for 10 repetitions, three times per week.
    2. Perform leg extensions for 10 repetitions, three times per week.
    3. Perform leg curls for 10 repetitions, three times per week.
    4. Perform bench presses for 10 repetitions, three times per week.

    Defensive Footwork and Movement

    1. Practice defensive slides to the right and left.
    2. Practice defensive movement forward.
    3. Practice defensive movement backward.
    4. Practice defensive footwork with changes of stance.
    5. Practice the jump stop out of the dribble.
    6. Practice pivoting on both feet.
    7. Run backward.
    8. Perform backward hops.
    9. Hop the full length of the court.
    10. Practice hopping with crossing footwork.
    11. Perform sprint drills with line touches.

    Tip-In and Finishing Work

    1. Perform 10 right-handed tip-ins.
    2. Perform 10 left-handed tip-ins.
    3. Perform 10 alternating-hand tip-ins.
    4. Perform 10 two-handed tip-ins.
    5. Perform 10 running tip-ins above the rim, jumping toward the basket — a “Superman” style drill.

    Passing

    1. Practice passing with a medicine ball.
    2. Perform 25 two-handed chest passes.
    3. Perform 25 bounce passes.
    4. Perform 25 hook passes.
    5. Perform 25 overhead passes.
    6. Perform 25 baseball passes.
    7. Perform 25 behind-the-back passes.
    8. Practice any other passing techniques you already know.

    Advanced Footwork and Ball Handling

    1. Practice dribbling with changes of rhythm and hesitation steps.
    2. Practice dribbling while using forward and backward pivots.
    3. Practice dribbling with crossover footwork.
    4. Perform 25 jumps while raising a medicine ball overhead.

    Play the Game

    1. Take part in summer competitions.
    2. Play plenty of games during the summer.
    3. Play against older and more experienced players.

    Take Care of Yourself

    1. Pay attention to good eating, recovery and sleeping habits.
    2. Adjust nutrition and body composition only according to your actual physical needs and appropriate professional guidance.
    3. Avoid alcohol, recreational drugs and smoking.
    4. If appropriate and safe, include selected running or movement activities on grass or sand.
    5. Use the jump rope regularly.
    6. The original program recommends training with ankle weights; this should be regarded as a historical recommendation rather than a universal modern training method.
    7. Play basketball in appropriate basketball shoes.
    8. The original program also recommends weighted-vest training. External loading should only be used when appropriate for the athlete and the exercise.

    Live Basketball During the Summer

    1. Spend as much productive time in the gym as possible during the summer.

    The original program described this as:

    “Live in the gym.”

    The message is commitment — not simply being physically present, but using the off-season deliberately.

    1. Play tennis to challenge hand-eye coordination and movement skills.
    2. Have shooting competitions with your parents, family members or friends.

    Play games such as 33 or other competitive shooting games.

    Give them a head start if necessary.

    1. Accumulate substantial quality basketball practice during the summer.

    The original program set an ambitious target of:

    250 hours of basketball during the off-season.

    The Bigger Idea

    The most valuable lesson in this list is not that every player should complete every task exactly as written.

    The message is that the off-season should be used intentionally.

    Develop:

    • your ball handling,
    • shooting,
    • finishing,
    • passing,
    • footwork,
    • physical preparation,
    • basketball understanding,
    • competitive experience,
    • recovery habits,
    • and confidence.

    Some days may focus on skill.

    Other days may focus on strength, movement or competition.

    The specific program should change according to the player.

    The commitment to improvement should remain.

    The season shows what kind of player you are.

    The off-season gives you the opportunity to change what kind of player you will become.
  • Strengthening After Knee Injury or Surgery

    Strengthening After Knee Injury or Surgery

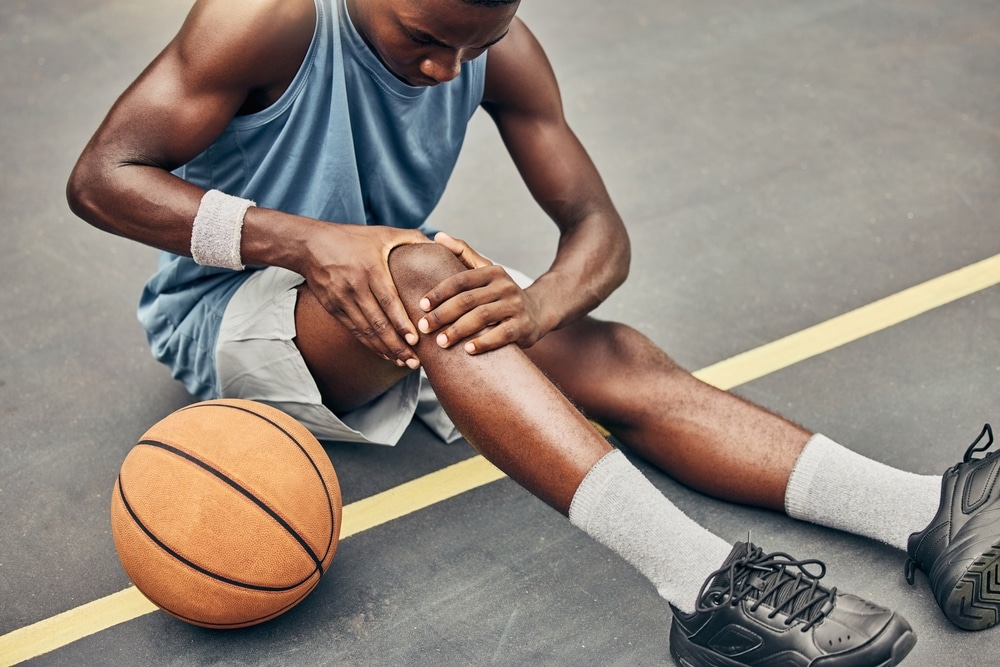
    How can we gradually strengthen the leg after a knee injury or knee surgery?

    The following exercises come from an earlier Basket Clinic rehabilitation program and focus primarily on:

    • controlled knee loading,
    • balance,
    • single-leg stability,
    • lower-limb strength,
    • coordination,
    • and gradual restoration of movement.

    Important: Rehabilitation after a knee injury or surgery must be individualized. The appropriate exercises and timing depend on the exact injury, surgical procedure and stage of recovery. These exercises should therefore be considered an archival training resource rather than a substitute for guidance from a doctor or physiotherapist.

    Knee Exercises

    1. Forward Lunge Position with Controlled Hold

    Step forward into a lunge position with the recovering leg.

    Keep the other leg controlled and gradually transfer the work toward the recovering side.

    Hold the position for approximately 4–5 seconds, then return to the starting position.

    The movement should remain controlled throughout.

    2. Heel Raise in a Lunge Position

    Take a lunge stance with the recovering leg in front and the other leg behind.

    Raise the heel of the front foot.

    Hold for approximately 4–5 seconds, then slowly lower it.

    3. Small Steps Forward

    Begin in a lunge position with the recovering leg in front.

    Using small steps, bring the other foot toward the recovering leg while keeping both knees flexed.

    Then return gradually to the original position.

    4. Small Cross-Steps Behind

    Maintain the same starting position.

    Use the other leg to make small crossing steps behind the recovering leg.

    Return gradually to the starting position.

    5. Step Together and Back

    Start with the recovering leg in front.

    Bring the other foot forward beside it while keeping both knees flexed.

    Then step back into the original position.

    6. Cross-Step Behind

    From the same lunge position, step the non-injured leg behind the recovering leg.

    Return to the starting position.

    The emphasis is on balance and controlled movement.

    7. Single-Leg Balance

    Begin with the recovering leg in front.

    Lift the opposite leg from the floor while maintaining the recovering knee in a flexed position.

    Hold the balance before returning the foot to the ground.

    8. Single-Leg Balance with Knee Extension

    Lift the opposite leg while gradually extending the recovering knee.

    Return slowly and under control.

    9. Single-Leg Flexion and Extension

    Lift the opposite foot from the floor.

    Balance on the recovering leg.

    From this position:

    • extend the recovering knee,
    • flex it again,
    • then place the opposite leg back on the floor.

    10. Trunk Rotation in a Lunge Position

    Hold a stable lunge position with the recovering leg forward.

    Place both hands behind the head.

    Slowly rotate the trunk:

    • to the right,
    • then to the left.

    The lower body should remain controlled.

    11. Small Knee Pulses

    Maintain the lunge position.

    Perform small, controlled up-and-down movements through the recovering knee.

    Avoid uncontrolled bouncing.

    Wide-Stance Exercises

    The next group of exercises begins from a wide stance.

    Both feet are turned slightly outward.

    The knees should track in the same direction as the toes and remain appropriately aligned with the ankles.

    12. Wide-Stance Squat

    Stand with the feet wide apart.

    Bend both knees into a controlled squat, then return upward.

    Maintain knee alignment throughout the movement.

    13. Alternating Side Loading

    From the wide stance:

    • bend the recovering knee while keeping the opposite leg straighter,
    • return to the middle,
    • then repeat toward the other side.

    The goal is to progressively transfer body weight from one side to the other.

    14. Heel Raises and Knee Bends

    Remain in the wide stance with both knees flexed.

    Perform:

    • two heel raises,
    • two slow knee-bending movements,
    • then repeat the heel raises.

    Maintain the same controlled lower-body position throughout.

    15. Step Together from a Wide Stance

    From the wide, flexed-knee position:

    • bring the right foot toward the left,
    • keep both knees flexed,
    • return to the wide stance.

    Repeat on the opposite side.

    16. Step Together with a Squat

    Bring one foot toward the other while maintaining knee flexion.

    Perform a controlled squat.

    Rise without completely locking the knees, then step back into the wide stance.

    Repeat on both sides.

    17. Single-Leg Hold to the Front

    From the wide stance, transfer the weight onto one leg.

    Lift the opposite leg and hold it slightly forward for approximately 4–5 seconds.

    Return to the wide stance.

    Repeat on the other side.

    18. Single-Leg Hold Behind

    Again transfer the weight to one leg.

    Lift the opposite leg and hold it slightly behind and across the body for approximately 4–5 seconds.

    Return to the starting position.

    Repeat on both sides.

    19. Toe-Raise Walk-In

    Begin in the wide stance with the knees flexed.

    Rise onto the toes.

    Using small steps:

    • bring the feet toward each other,
    • maintain knee flexion,
    • lower the heels in the middle,
    • rise onto the toes again,
    • and step back into the wide stance.

    Then lower both heels.

    20. Heel Raises, Step-In and Squat

    From the wide stance:

    1. perform two heel raises,
    2. use small steps to bring the feet together,
    3. perform a controlled squat,
    4. rise again without fully locking the knees,
    5. step back into the wide stance.

    21. Alternating Side Heel Raises

    From the wide stance:

    • extend the left knee while keeping the right knee flexed,
    • perform two heel raises on the right side,
    • return to the central position with both knees flexed,
    • perform two heel raises,
    • then repeat the sequence on the opposite side.

    Quality Before Quantity

    After a knee injury or surgery, the objective is not simply to complete as many repetitions as possible.

    Movement quality matters.

    The athlete should pay attention to:

    • balance,
    • knee alignment,
    • controlled flexion and extension,
    • stability,
    • gradual weight transfer,
    • and symmetrical movement whenever appropriate.

    Progression should be gradual.

    Basketball eventually demands much more than basic strength.

    The player must ultimately regain the ability to:

    • run,
    • stop,
    • change direction,
    • jump,
    • land,
    • defend,
    • and tolerate repeated basketball-specific loading.

    These exercises represent only one stage of that process.

    The goal is not simply to make the knee stronger.

    The goal is to rebuild the movement capacity required for a safe return to basketball.

  • Basketball Players Need Strength Training Too

    Basketball Players Need Strength Training Too

    Try it — and let us know what results you achieve.

    Strength Training for Basketball Players

    We strongly believe that basketball players need strength training.

    Work in the weight room can have a direct impact on performance on the basketball court.

    As players become stronger, they may be better prepared to:

    • attack the basket aggressively,
    • compete for rebounds,
    • absorb physical contact,
    • and defend with greater physicality.

    The purpose of this basketball-specific strength program is to help players become stronger while maintaining mobility and flexibility.

    The program was designed as a demanding, full-body training routine.

    The work done in the weight room should ultimately have one purpose:

    to help the player perform better on the basketball court.

    Basic Principles of Weight Training

    1. Train two or three times per week, preferably on non-consecutive days.
    2. Perform every repetition with correct technique.
    3. Once correct technique has been learned, progressively use greater resistance as appropriate.
    4. Rest approximately one minute between sets.
    5. Try to increase the resistance progressively as training experience develops.
    6. Keep a training diary so that progress can be monitored and the work remains structured.

    Three-Day Full-Body Program

    A possible weekly schedule is:

    Monday – Wednesday – Friday

    or:

    Tuesday – Thursday – Saturday

    The original program contains two different exercise routines. These can be alternated within the weekly schedule.

    Workout A

    1. Abdominal Exercises

    Examples:

    • oblique sit-ups,
    • hanging leg raises.

    The objective is to strengthen the trunk and provide a stable base for basketball movement.

    2. Bench Press

    10 – 8 – 6 – 4 repetitions

    Use controlled technique throughout the movement.

    3. Lat Pulldown

    3 × 10

    Develop the muscles of the upper back.

    4. Biceps Exercise

    3 × 10

    5. Triceps Cable Pushdown

    3 sets to the prescribed limit in the original program

    6. Squat / Leg Press

    12 – 10 – 8 – 6 repetitions

    Lower-body strength is particularly important for:

    • jumping,
    • rebounding,
    • acceleration,
    • defensive movement,
    • and playing through contact.

    7. Supported Leg Raises

    10 – 8 – 6 repetitions

    8. Calf Raises

    3 × 30

    9. Wrist Curls

    3 × 25

    Grip and forearm strength can also contribute to stronger ball control and physical play.

    Workout B

    1. Abdominal Exercises

    Examples:

    • sit-up with leg raise,
    • side sit-up,
    • abdominal crunch.

    2. Decline Bench Press

    10 – 8 – 6 repetitions

    3. Seated Row

    3 × 10

    4. Lateral Raises

    10 – 8 – 6 repetitions

    5. Dips

    3 × 10

    6. Dumbbell Biceps Exercise

    3 × 10

    7. Squat / Leg Press

    12 – 10 – 8 – 6 repetitions

    8. Behind-the-Neck Pulldown

    10 – 8 – 6 repetitions

    This exercise appears in the original program and reflects the training practices of the period.

    9. Calf Raises

    3 × 30

    Strength Should Serve Basketball

    Strength training should not be separated from the demands of the sport.

    The objective is not simply to become bigger or to lift heavier weights.

    For a basketball player, strength should support actions such as:

    • finishing through contact,
    • holding defensive position,
    • boxing out,
    • rebounding,
    • accelerating,
    • changing direction,
    • and competing physically throughout the game.

    The strongest player in the weight room is not automatically the best basketball player.

    The real value of strength appears when it can be transferred to the court.

    Technique Comes First

    One principle from the program remains especially important:

    Every repetition should be performed with correct technique.

    Increasing resistance has value only when the movement can still be executed properly.

    Progress should therefore be gradual.

    Training should be recorded.

    Performance should be evaluated.

    And the work should always remain connected to the athlete’s basketball development.

    Strength is not the goal by itself.

    Better basketball performance is the goal.